To get the full plans and directions for building these Magazine Basket CLICK HERE
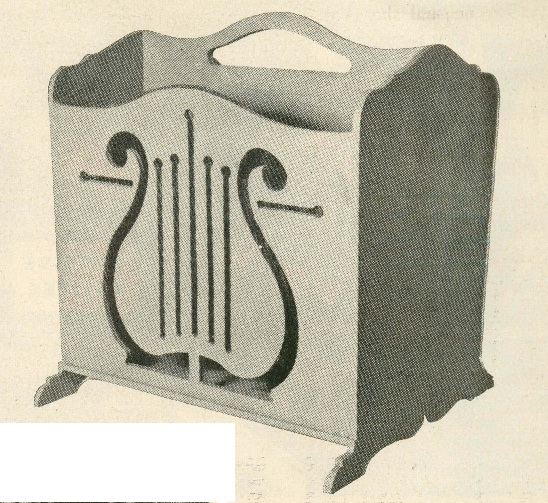
IF CURRENT magazines are to be kept instantly available and still be stored in an orderly manner, the use of a magazine basket is almost a necessity. This lyre magazine basket is one that any home craftsman who possesses a jig saw can make without difficulty. The original was made of pine-faced plywood and lacquered, but plywood faced with mahogany, walnut or any of the better types of cabinet wood may be substituted and the work finished natural or stained.
The end members will require two pieces of 3/8″ stock 13″ wide and 14″ long. A full size pattern of this member will have to be prepared, then traced on one end member. The outline of the pair should be cut at the same time. This can be I done by placing the two members face to face, with the one- on which the contour was traced uppermost. The two pieces can be fastened together temporarily with 1/2″brads driven in the portions that are to be removed. The cutting should be done on the jigsaw. The edge can be made smooth with a file, followed by sandpapering with No. 1 and No. 2/0 sandpaper.
For the side members, two pieces of 3/8″ stock 10 3/4″ wide and 13″ long will be required. The same procedure that was outlined for the end members should be repeated. The piercing which produces the lyre is accomplished on the jig saw. In order that the blade of the jig saw may be passed through the stock, small holes will have to be bored through the piece within each area that is to be pierced.
The bottom member will require a piece of stock 3/8″ thick, 10 1/4″ wide and 13″ long. The partition will take a piece 3/8″ stock 13 1/2″ wide and 13″ long. As this member will require the cutting of a hand hole as well a the shaping of the upper edge, a pattern should be prepared and the outline traced on the stock. The work of cutting the upper edge and hand hole to the required contour should be done on the jig saw.
With the completion of the-various parts, all surface should be sandpapered to remove tool marks and to smooth them preparatory to assembly. Assembling of the various member will require glue and 1″ No. 20 brads. Surfaces that butt against one another should have glue applied to them before the pieces are joined. Any excess glue forced from the joints when the brads are driven should be immediately wiped off with a damp cloth.
The side members should first be set between the end members and secured with brads. The bottom member is next set in place and secured to the end member as well as to the lower edge of the side member. The partition is finally placed in position and secured to the end and bottom members.
If the work is to have an enamel finish, a coat of shellac should be applied first; then when dry, it should be sanded with No. 4/0 sandpaper. The enamel is applied over this filler, coat of shellac. If the work is stained, the stain should be applied directly to the wood. Several coats of shellac varnish or lacquer over the stain will complete the job. If plywood has been used and a stained or natural finish has been applied, the exposed end grain can subdued by applying several coat of flat black enamel to these surface.
To get the full plans and directions for building these Magazine Basket CLICK HERE


